Import from Figma
Three ways to bring Figma designs into Brilliant, ordered from least to most setup:
On the web, from the "+" New menu. Paste a Figma file link (or click Create from Figma) in the navbar's New menu. The first time, Brilliant sends you through Figma's sign-in and then picks up right where you left off; the import lands in a brand-new project named after the file and opens straight in the editor.
In the desktop app, from the right toolbar. Paste a Figma URL into the editor's Import section to pull a whole file (or specific pages, or one selected subtree) into the document you have open. Each Figma page becomes a Brilliant canvas.
From the Brilliant plugin, inside Figma. Push a selection out of Figma with Copy to Clipboard (no sign-in, it rides your system clipboard) or Send to Brilliant (drops straight onto the canvas once the plugin is connected to your desktop app or paired with your account).
All three route through the same import pipeline, so the fidelity is identical. Pick based on where you're starting.
Create from Figma on the web
If you're on brilliant.design in the browser, the fastest path is the New menu: the + button in the top navbar.
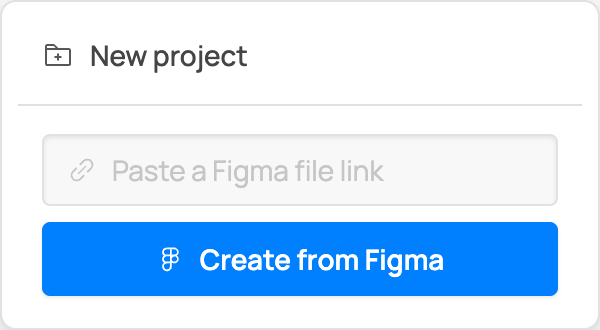
The menu has one job for Figma: paste a link, then hit Create from Figma (or press Enter in the field). Brilliant accepts the same link shapes everywhere:
https://www.figma.com/design/FILE_KEY/…(the current form)https://www.figma.com/file/FILE_KEY/…(the older form)a bare file key (10–30 letters and digits)
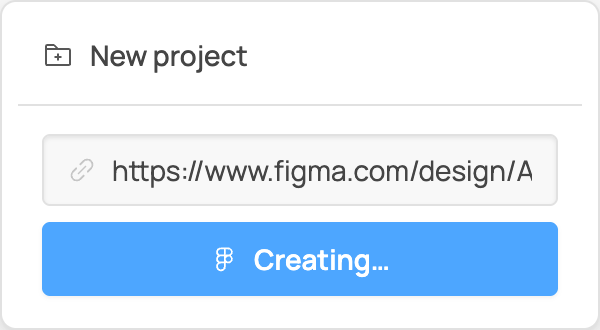
The first time you do this, your account isn't linked to Figma yet, so Brilliant stashes your link, sends you through Figma's consent screen, and returns you to the same page. You don't have to click anything twice: once you approve, the import resumes on its own and finishes the job you already asked for. On later imports the account is already linked, so there's no round-trip at all.
When it runs, Brilliant claims a new project named after the Figma file (the slug in the link becomes the project name; a link with no slug falls back to figma-import) and drops you straight into the editor, where the file imports onto the canvas. No dialog, no name to type.
Import a whole file by URL (desktop)
In the desktop app, Brilliant's right toolbar has an Import section that accepts a Figma URL or bare file key. This is the path with the most control: whole file, specific pages, or just a selected subtree.
1. Sign in once
Paste a URL (figma.com/design/…, the older /file/… form, or a bare 10–30 character file key) and click the slider button that appears next to the field. Brilliant opens Figma's consent screen in your browser; once you approve, you're set. Tokens persist and refresh silently, and the section shows a Connected indicator at the bottom (hover it to reveal Disconnect). This desktop link is separate from the web one, so connecting on desktop doesn't connect the web New menu, and vice versa.
2. Pick what to import
Three modes, same field:
Whole file: click Import from Figma with everything as-is. This is the default.
Specific pages: click the slider button to expand the page picker and uncheck the pages you don't want.
Selection only: if your URL contains
?node-id=…(Figma generates this when you right-click an element → Copy link), an extra checkbox appears next to the slider button. Toggle it and only that subtree is fetched.
node-id but don't toggle the selection-only checkbox, Brilliant imports the whole file anyway. The toggle is what activates the node-id.
While the import runs, the section reports its stage: Fetching, Downloading images (m/n), Converting. It also surfaces Figma rate limits inline (Rate limited by Figma, retrying in 4s…). Cancellable any time.
3. Where it lands
How Brilliant places the imported pages depends on how many came back:
More than one page: Brilliant creates a folder named after the Figma file and drops one canvas per page into it.
Exactly one page, and your current canvas is empty: the import lands on the current canvas. No folder, no new canvas.
Exactly one page, and your current canvas has content: a single new canvas at the document root.
Selection-only imports always produce a single page, so they follow the one-page rule above: an empty current canvas keeps its name and receives the import; otherwise a new canvas named <File name> Selection lands at the document root. Canvas names elsewhere come from the Figma page names, with dots replaced by spaces to avoid colliding with the .bl extension. Name collisions get a (2), (3), … suffix.
Files you don't own
Brilliant calls Figma's REST API as you, so Figma's per-user rate limits apply to your account. The catch worth knowing about: your limit depends on your seat type on the plan that owns the file, not on the file itself.
If you're a Full or Dev seat (the file owner, or a paid editor on the team), you're fine. The endpoints Brilliant uses (GET file, GET file nodes, GET image fills) start at 10 calls per minute on the Free / Starter plan and climb from there.
If you're a View or Collab seat on someone else's plan (for example, someone shared a file with you and you don't have edit access), Figma caps file fetches at 6 per month. One Brilliant import burns one of those six. After that, every import returns HTTP 429 and Brilliant reports Rate limited by Figma, retrying in {n}s… until the bucket refills (which won't be soon, since the reset is monthly).
Two ways out:
Duplicate the file into your drafts. From Figma, open the file menu and choose Duplicate to your drafts. The copy is yours: you become the owner, your seat type for that file is now Full, and the limit jumps from 6 a month to ten or more per minute. (File owners can disable duplication; if the option is greyed out, that's why.)
Use the plugin instead. The plugin's Copy to Clipboard button ships data over your clipboard: no API call, no quota, no auth. It's the safest path when you only need a frame or two, or when you're stuck behind the monthly cap.
Push a selection from the plugin
If you're already in Figma and just want a frame or two on the canvas you have open, the Brilliant plugin is the faster path. It has two buttons, and they cover two different situations.
1. Install the plugin
Grab Brilliant from the Figma Community and click Open In Figma to add it to your account.
2. Run it on a selection
In Figma, select what you want to copy, then open Plugins → Brilliant (or right-click → Plugins). A small panel appears with up to two action buttons and a connection status row at the bottom:
Copy to Clipboard is always there. Its label follows the selection: Copy "Hero" to Clipboard for a single layer, Copy 5 to Clipboard for a multi-selection.
Send to Brilliant shows up only once the plugin has a live connection (see below). Its label mirrors the other button: Send "Hero" to Brilliant, Send 5 to Brilliant.
The status row tells you what the plugin can reach right now: Looking for Brilliant…, Connected to Brilliant (your local desktop app), Connected via cloud (with a count of live editors), or Brilliant not running.
Copy to Clipboard, then paste (no sign-in)
The zero-setup path. Click Copy to Clipboard (or press Enter or ⌘C). The button flashes Copied to clipboard when the payload is on your clipboard. Then switch to Brilliant, click anywhere on the canvas, and press ⌘V. Brilliant recognizes the Figma payload and runs it through the full import pipeline.
No Brilliant sign-in, no API access: the selection travels over your system clipboard, so this path works even when you're behind Figma's monthly fetch cap.
Send to Brilliant (connect once)
Send to Brilliant skips the clipboard and drops the selection straight onto your active canvas. It appears once the plugin is connected, over one of two lanes:
Your local desktop app. If the Brilliant desktop app is running, the plugin finds it automatically over localhost and the status row reads Connected to Brilliant. Nothing to set up.
The cloud relay. When the desktop app isn't reachable (you're in the Figma web editor, say), the plugin offers a Connect to Brilliant button that pairs through an opt-in cloud relay.
Pairing is one click, and you approve it yourself:
Click Connect to Brilliant in the plugin. The status row switches to Waiting for approval… and Brilliant opens an approval page in your browser.
On that page (
/figma-connect), you confirm which Brilliant account is being linked, then click Approve. If you're signed out, Brilliant sends you through sign-in first and lands you right back on the card.The page confirms Connected, the plugin picks the pairing up on its next check, and the status row reads Connected via cloud. The link stays until you disconnect it.
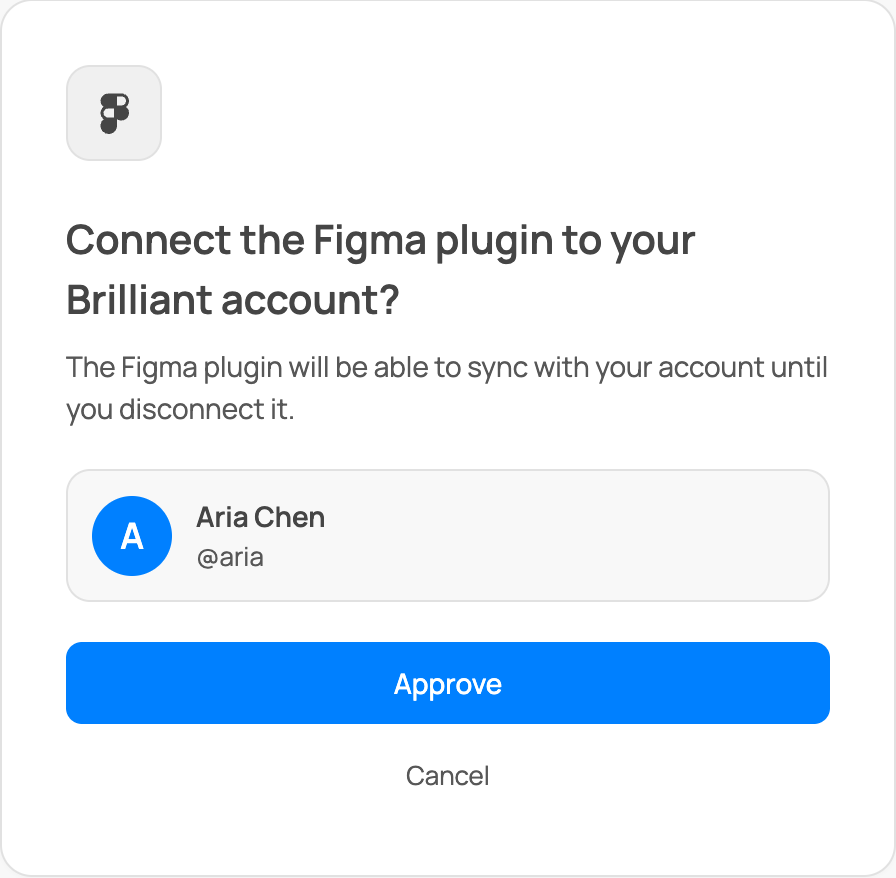
The approval link is single-use and expires after about ten minutes. If it lapses, the page says so and you just reopen the connection from the plugin. To drop the cloud link later, use Disconnect cloud in the plugin's status row.
Manage your Figma connection
The web Figma link (the one the New menu's Create from Figma uses) is managed from your account settings: open Settings → Account & security, and if a link exists you'll see a Connected apps card with Figma listed. Click Disconnect to revoke Brilliant's access; the next web import will ask you to sign in again.
The desktop link is separate and lives in the editor's right-toolbar Import section (hover the Connected indicator to reveal Disconnect). The plugin's cloud pairing is separate again, and you drop it with Disconnect cloud in the plugin.
What carries over
Layout: auto layout (direction, sizing, padding, gap, wrap, alignment), absolute-positioned children, layout grids, frames, and groups.
Geometry: vector paths, boolean operations, ellipse arcs and rings, corner radii (uniform or per-corner), aspect-ratio locks.
Fills and strokes: solid colors; linear, radial, and angular gradients (diamond gradients flatten to their first stop's color); image fills (bytes come along with the import, so no broken references on the Brilliant side). Stroke weight, alignment, joins, and caps.
Effects: drop shadow, inner shadow, layer blur, background blur.
Text: font family, weight, size, line height, letter spacing, alignment, fills, plus per-character overrides for mixed-style text.
Components and instances: if you include both the master component and its instances in your selection, the master / instance link is preserved and overrides are detected automatically. Instances copied without their master come over as standalone elements with their final appearance, but no link back.
Element-level: opacity, blend mode, visibility, and masks.
What doesn't
Non-variant component properties. Variant axes come through as real, editable component sets, one variant per combination. Figma's boolean, text, and instance-swap properties don't: each variant keeps its resolved look, but those editable knobs are dropped.
Interactive prototypes. Connections, transitions, and prototype flows aren't part of the canvas model.
Variables and shared styles. Resolved values (colors, sizes, type) come through, but the bindings back to Figma Variables or shared color / text / effect styles don't.
FigJam, Figma Slides, Dev Mode. The plugin runs in the Figma design editor only.
Next
Tour the editor: Quick Tour.
See how the two tools compare: Brilliant vs Figma.