Quick Tour
A whirlwind tour of the Brilliant editor: the regions of the screen, the one shortcut that unlocks everything else, and the handful of keybindings worth burning into muscle memory on day one. If you'd rather skip straight to designing with an agent, jump to Your First AI Chat.
The editor at a glance
Brilliant's editor is laid out around four toolbars, one on each edge of the canvas, plus the canvas itself in the middle. Once you know what each region is for, you always know where to look.
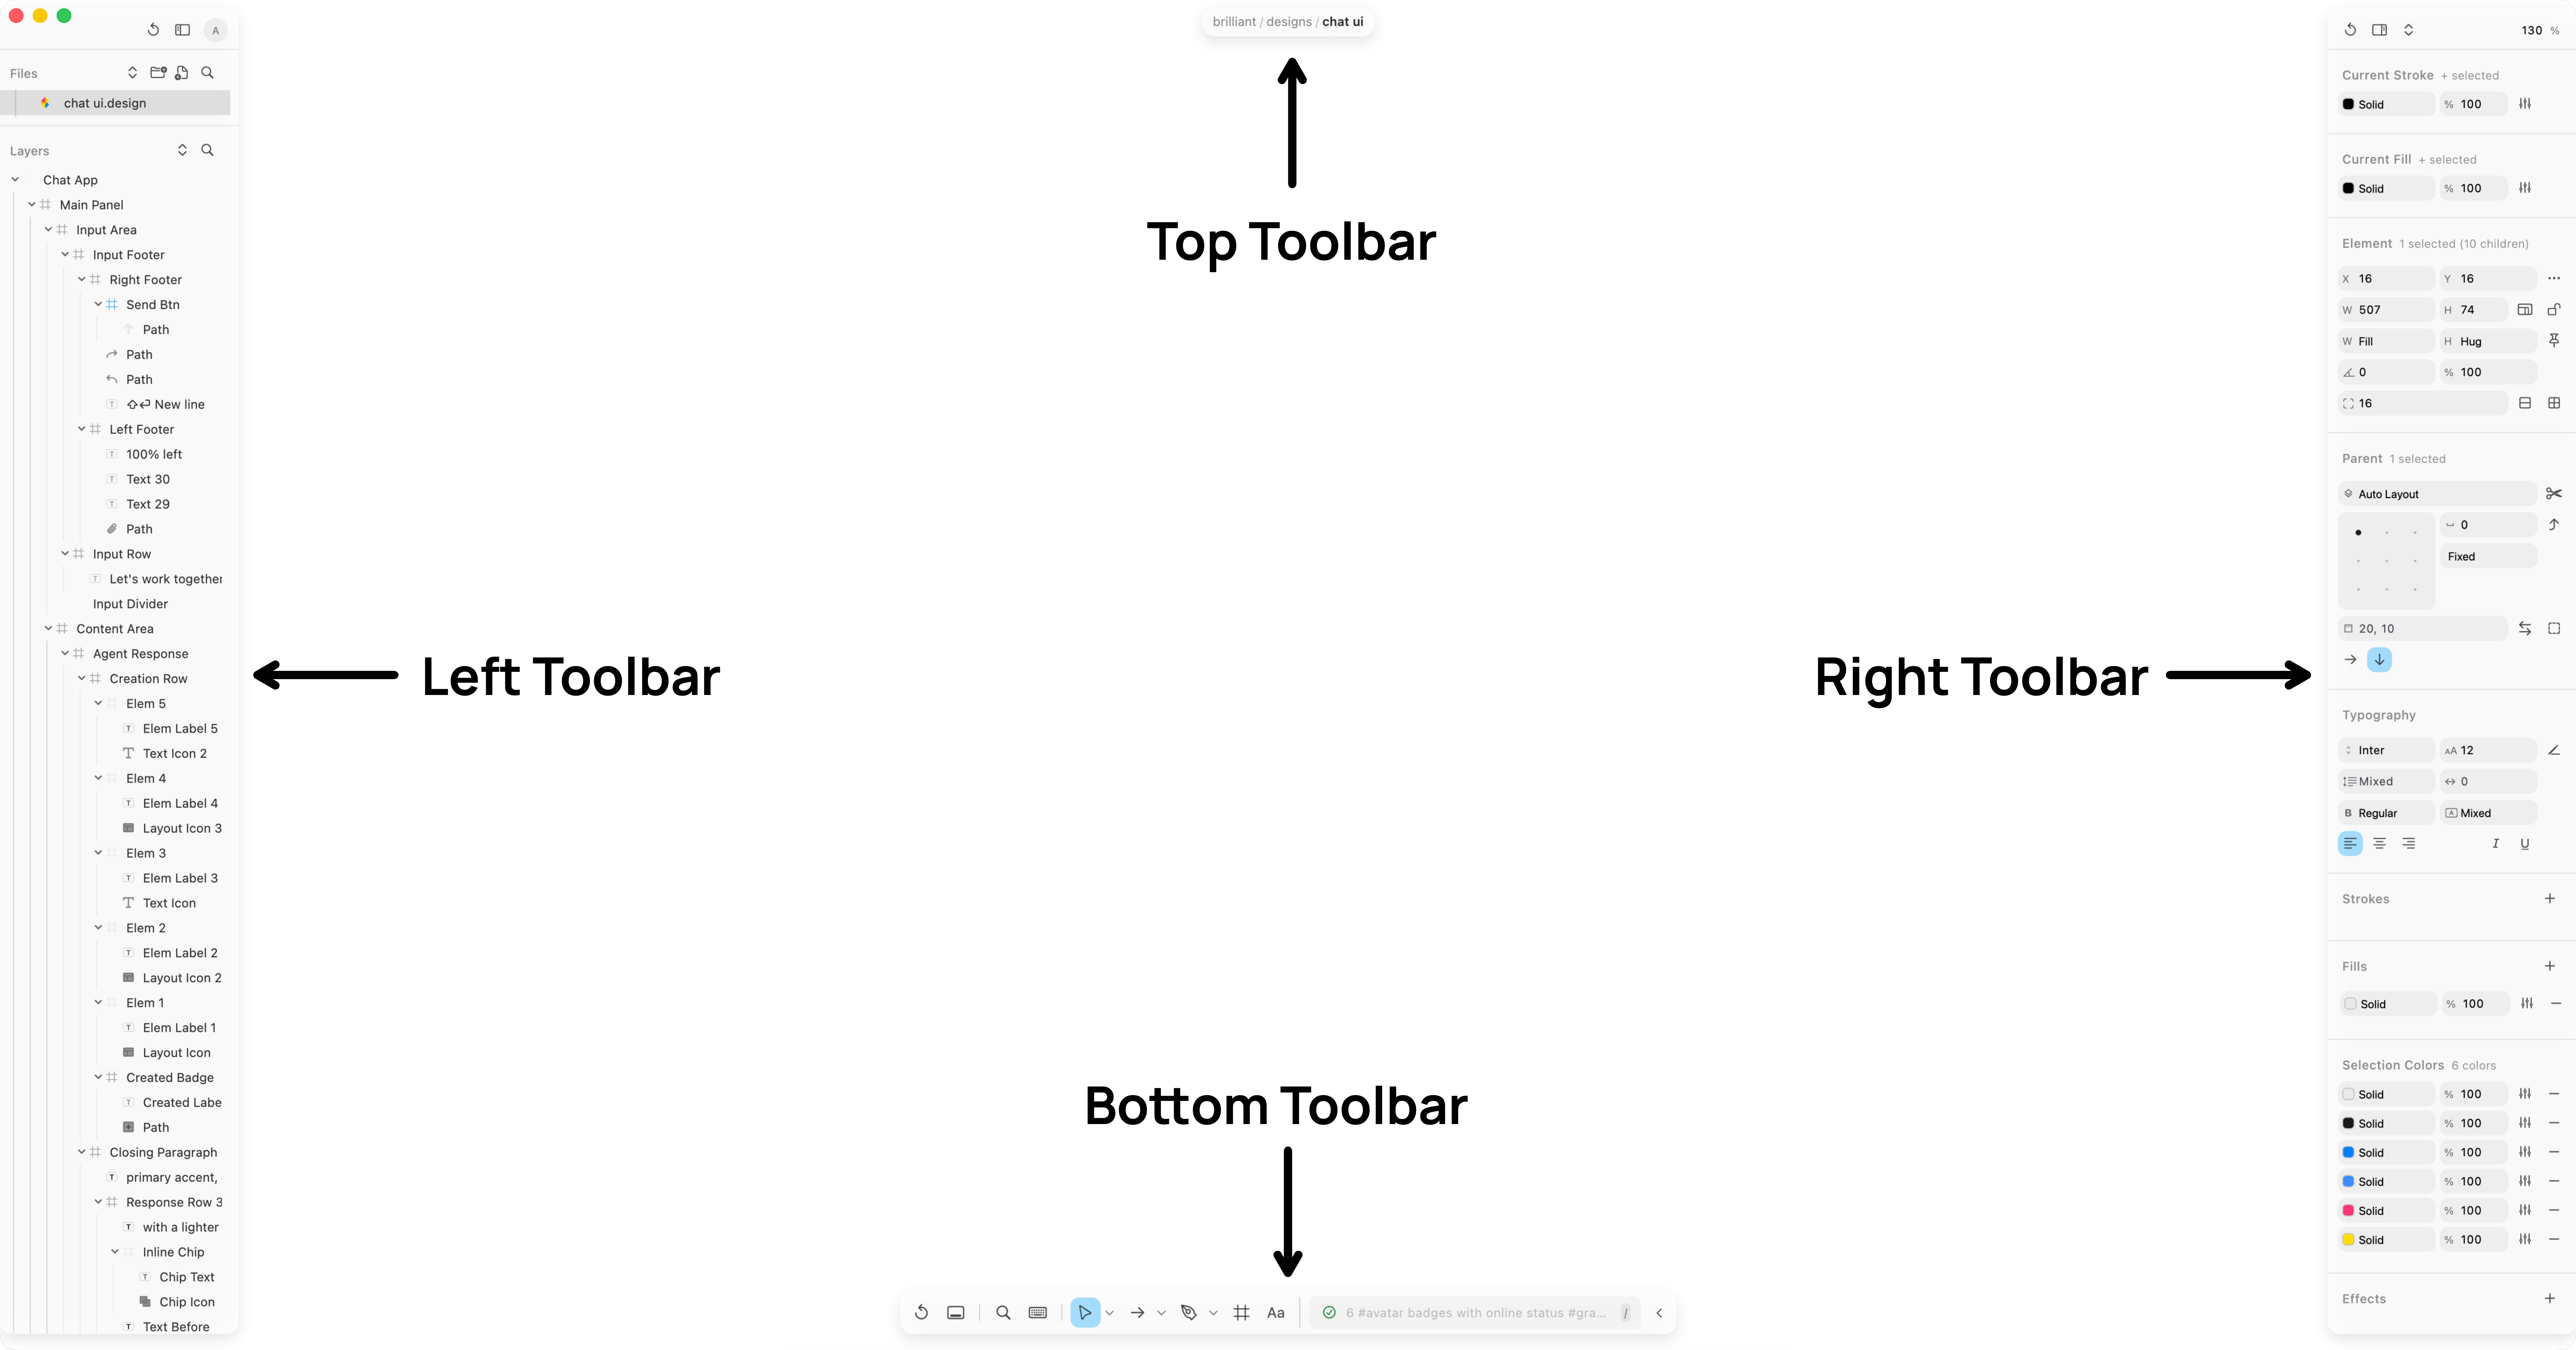
Top toolbar: one island across the top. The home button sits on the left, and a tab for each open project sits beside it, so you can jump between projects and back to home. In the web editor and the overlay, where there is no tab strip, it shows the breadcrumb for the active canvas instead, in the form workspace / folder / canvas.
Left toolbar: your project tree and layer list. The top half is the file explorer, showing every canvas in the document; the bottom half is the layers explorer, showing every element in the active canvas, nested the way the canvas nests.
Right toolbar: properties for whatever you currently have selected. The contents change based on the selection (typography, fill, stroke, effects, layout, frame properties, and so on); with nothing selected, it shows document-level settings.
Bottom toolbar: the AI chat input, always one click (or /) away.
Canvas: everything else. This is where you design.
Everything is a ⌘K away
The single shortcut worth learning before any other is ⌘K. It opens a global search palette that finds and runs anything in the editor: commands, canvases, layers, fonts, and chats. If you ever forget where a feature lives or what it's called, you don't have to hunt through menus. Open ⌘K, type a few letters of what you want, and hit Enter.
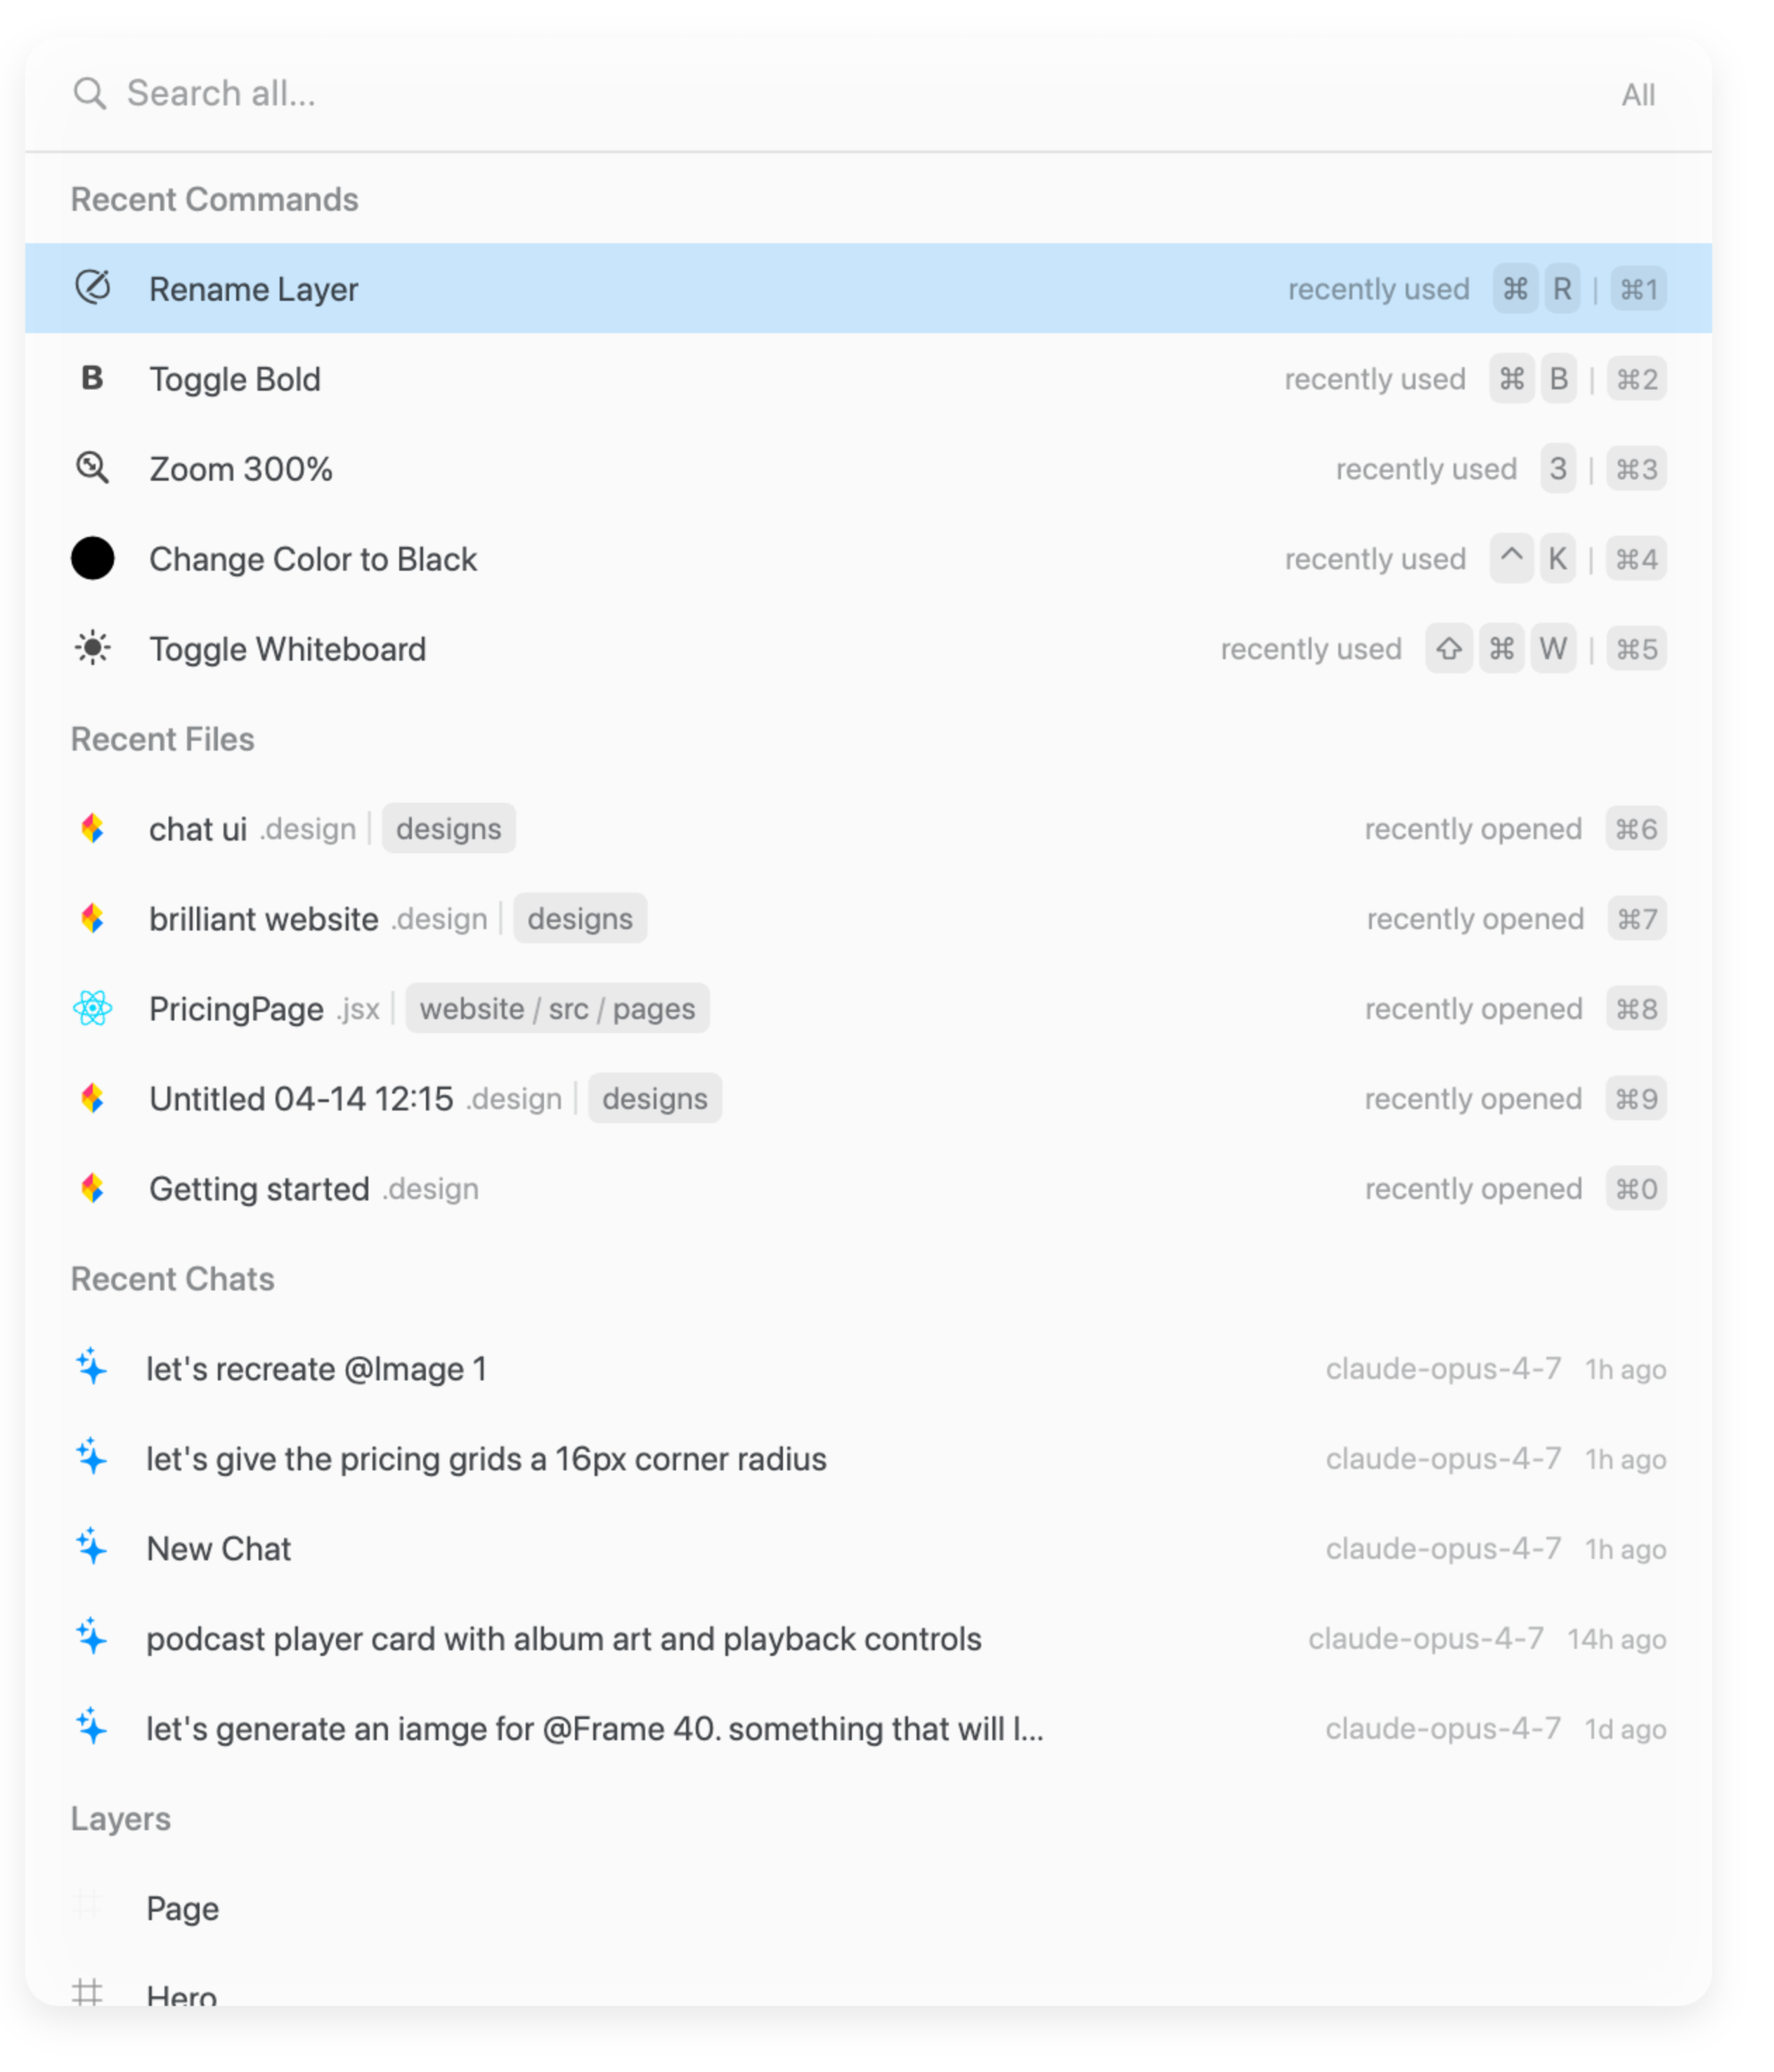
Treat ⌘K as your escape hatch. Every shortcut on this page is worth memorizing, but if you forget any of them, ⌘K will still get you there.
If you know the category of what you're after, there are narrower, faster searches for each one:
⌘L searches layers in the active canvas.
⌘P searches canvases in the document.
⌘⇧I searches your AI chats.
All four palettes share the same keyboard-first behavior: type to filter, arrow keys to move, Enter to commit, Esc to dismiss.
The AI chat
The bottom toolbar is home to the integrated AI chat, an agent that reads your canvas, sees your selection, and runs real design commands on your behalf. Tap the input or press / to open it.
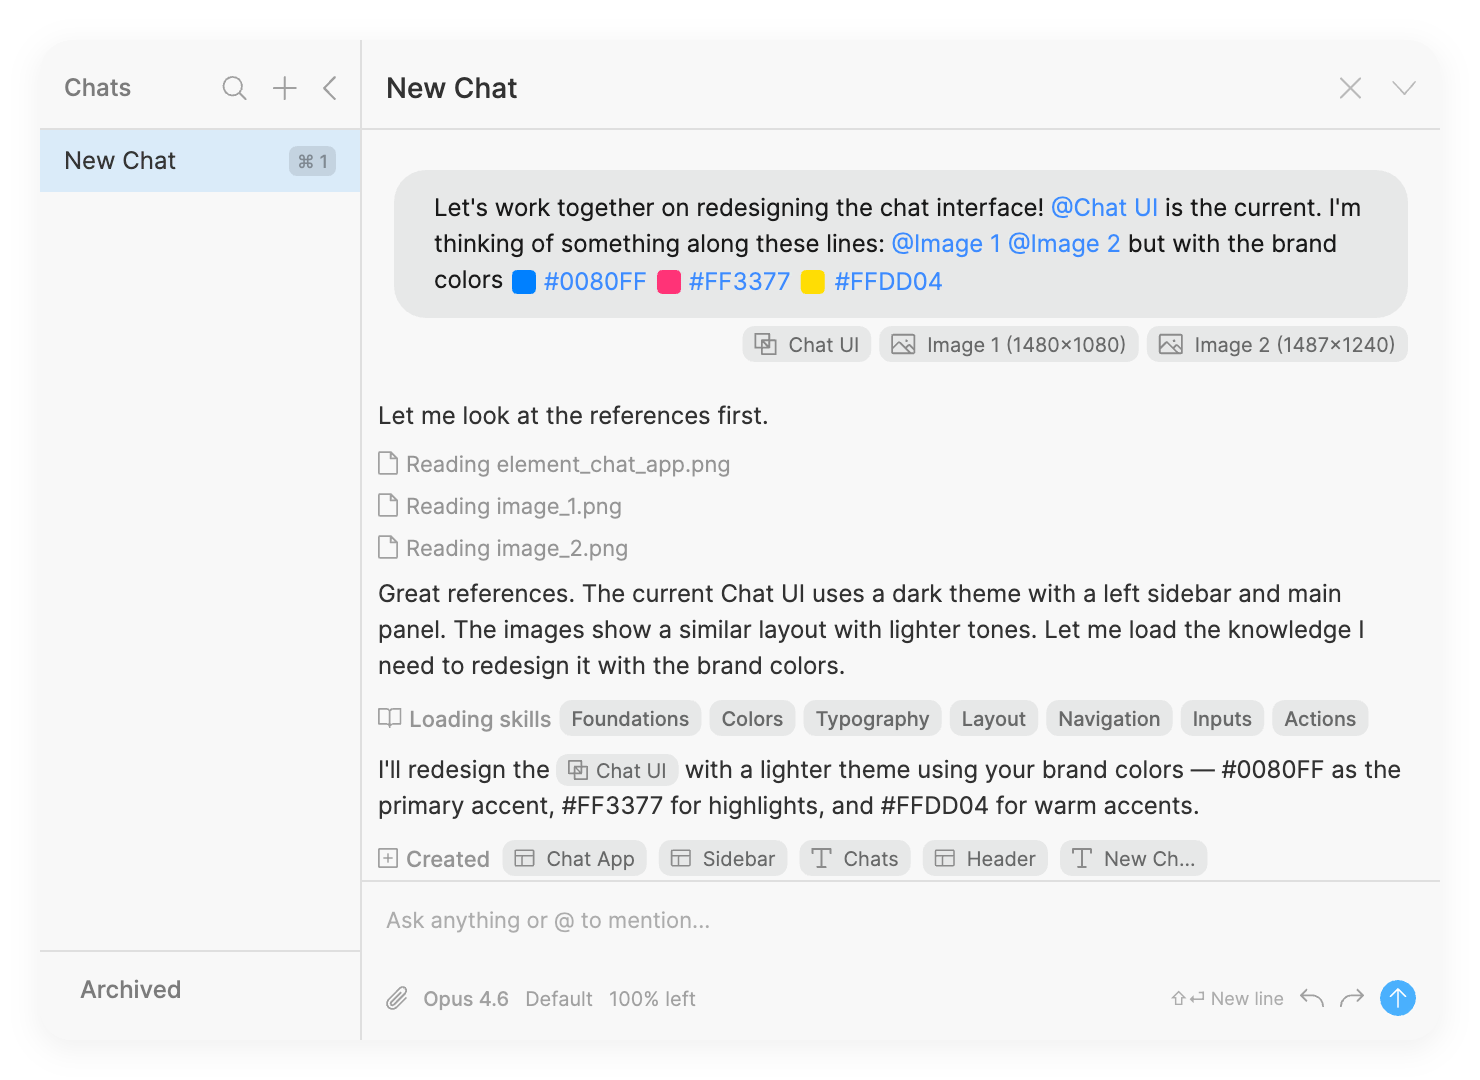
The chat gets its own walkthrough in Your First AI Chat, including how to reference elements with @, attach images, pick colors, and run parallel chats. For this tour it's enough to know where it lives.
Moving around the canvas
Canvas navigation in Brilliant follows the conventions you already know from other design tools:
Pan: hold Space and drag, or two-finger drag on a trackpad.
Zoom: ⌘= / ⌘-, or pinch on a trackpad, or ⌘scroll.
Fit the whole canvas: ⌘⌃A.
Fit the current selection: ⌘⌃F.
Toggle 100% zoom: 0 flips between 100% and whatever zoom you were at before.
If you ever get lost, ⌘⌃A is the fastest way to bring the whole design back into view.
Selecting and moving things
Click to select a single element. ⇧click to add or remove from the selection.
Drag on empty canvas to marquee-select everything inside the rectangle.
Drill into a frame: with the frame selected, press Enter to narrow the selection to whatever is inside it. ⇧Enter walks back up to the parent.
Cycle siblings: Tab / ⇧Tab moves the selection to the previous or next element at the same level.
Move with the mouse, or nudge with the arrow keys. Hold ⇧arrow for a larger step.
Duplicate with ⌥drag (drag a copy out) or ⌘D (drop a copy in place).
Undo freely
Brilliant keeps a full undo history for the canvas. If you don't like a change, whether yours or the AI's, walk it back:
⌘Z to undo.
⌘⇧Z to redo.
There's no penalty for experimenting. Break something, then roll it back.
Your files save themselves
There's no save button. Every change, whether yours or the AI's, is saved to the .bl file on disk shortly after you stop editing (a brief debounce, so a burst of edits writes once), so you can close the app or lose power without losing work. The document name in the top toolbar is always a live reflection of what's on disk. A fresh launch drops you straight into a Scratch project, so you can start designing before you've opened a folder of your own.
.bl files are plain-text Blueprint, so they drop cleanly into git (or any other version control system). Every commit renders as a human-readable diff, so you can branch your designs, review them in pull requests, and git blame a stray color change the same way you would on code:
 c16fc75741feed85 fr p(80,80) s(480,320) rd(16) "Hero"
-  88625e475868c087 r p(24,24) s(160,100) f[(r1,#F8F8F8)] rd(8) "Panel"
+ 88625e475868c087 r p(24,24) s(160,100) f[(r1,#0080FF)] rd(8) "Panel".bl file in Finder works too. Autosave covers "I closed the laptop"; a duplicate or a commit covers "I want a version I can go back to." And once you publish a project to brilliant.design, you also get named checkpoints and a full history for it.Next
Use your own AI (optional): the chat works out of the box on Brilliant AI; connect a provider when you want to run it on your own key or coding agent. See Connect an AI Provider.
Design with the built-in agent: Your First AI Chat walks through prompting, element references, and iterating.
Drive Brilliant from your editor: skip the in-app chat and use Claude Code, Cursor, or any other MCP-speaking agent instead.