Vectors
Under every shape in Brilliant is an editable vector path. This page covers drawing paths from scratch, editing their nodes and handles, and how fills and strokes attach to the parts of a path.
Drawing paths
Pen (P): click to drop a node, or click and drag to pull out a pair of curve handles as you place it. Keep clicking to extend the path, and click the first node again to close it.
Pencil (⇧P): draw freehand, and Brilliant smooths your stroke into a clean vector when you release.
Hold Shift while drawing to constrain angles. Press Esc to finish the current path.
Vector edit mode
Any shape, not just pen drawings, can be edited as a vector. Select it and press Enter, or double-click it, to enter vector edit mode. Its nodes and edges become directly editable. (Text is the exception: outline it to vectors first, covered in Text.)
To leave, press Esc. The first press clears any selected nodes; a second press exits vector edit mode and returns you to the Move tool. Double-clicking or dragging outside the shape also exits.
Nodes and handles
Inside vector edit mode you work with nodes (the points) and handles (the levers that curve the path through a node). Drag a node to move it, and drag its handles to reshape the curve on either side.
Each node has a type that decides how its two handles relate:
Straight: a sharp corner with no handles.
Mirrored: a smooth node whose handles mirror each other in both direction and length.
Asymmetric: a smooth node whose handles stay in line but can differ in length.
Disconnected: a node whose two handles move fully independently, for a sharp change of direction that is still curved.
Flip between the three curved types below and watch the same curve reshape through its center node: mirrored gives a smooth symmetric arc, asymmetric a smooth but lopsided one, and disconnected a broken corner. The two hollow rings are that node's control handles, drawn just as the editor shows them.
Hold Option while dragging a handle to move just that one, breaking it away from its partner.
Adding and removing nodes
Add a node: hover over an edge until a plus marker appears, then click to insert a node there. The curve keeps its shape.
Remove a node: select it and press Delete. A node with an edge on each side dissolves and its neighbors reconnect, so the path stays whole. Delete enough that fewer than two nodes remain and the whole element goes.
Region fills and edge strokes
Vectors in Brilliant fill and stroke by part, which is more flexible than one fill for the whole shape. Any enclosed region of a path can take its own fill, and every edge can take its own stroke. So a single path can have several filled regions and separately styled outlines.
In practice: a closed path can carry both a fill and a stroke, while an open path shows only its stroke. Click a region or an edge (rather than a node) to select just that part, then set its color from the right toolbar. See Color and fills.
Combining paths
Boolean operations build complex shapes from simple ones. Select two or more elements and combine them (the operations also live in the right-click Boolean submenu):
Union (⌥⇧U): merge into one shape.
Subtract (⌥⇧S): cut the top shapes out of the bottom one.
Intersect (⌥⇧I): keep only the overlap.
Exclude (⌥⇧E): keep everything except the overlap.
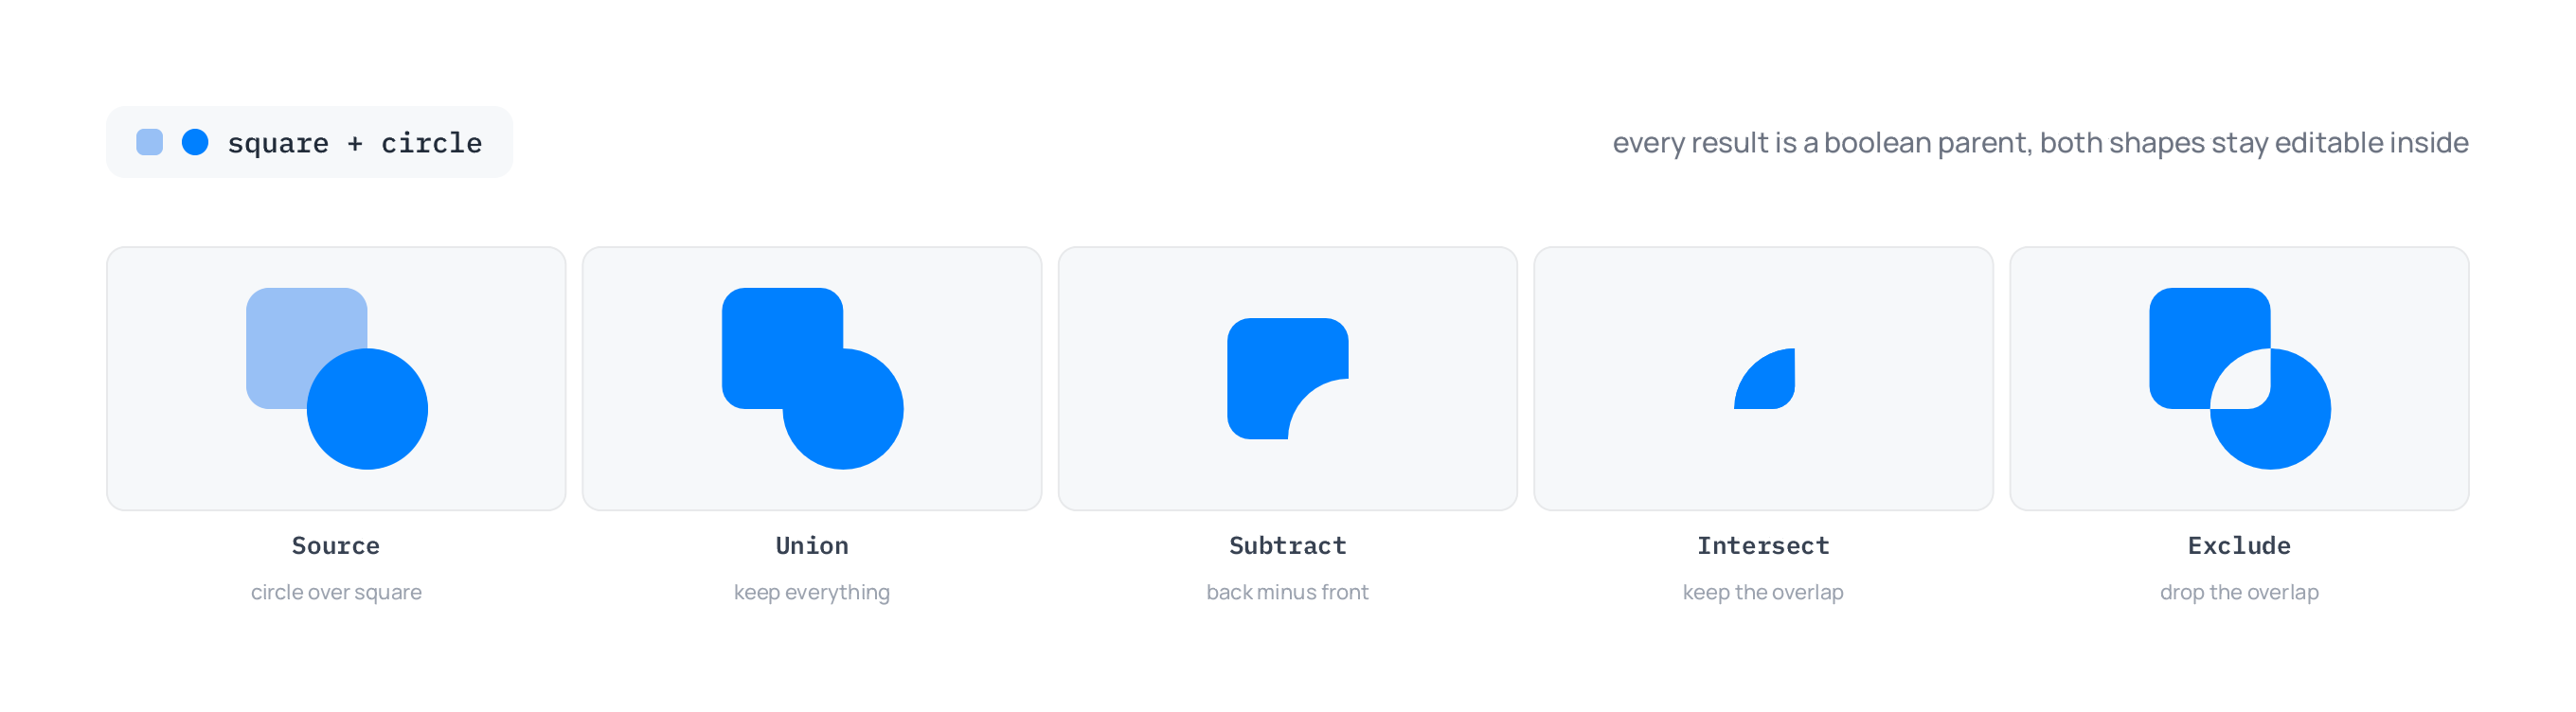
Booleans stay editable: you can still move and reshape the elements inside them. When you want to bake the result into a single flat path, use Flatten (⌘Enter).
Next
Fill your regions and strokes: Color and fills.
Back to the tools: Tools.